Using the default Ubuntu user account provided in AWS images is not recommendedIn this article, I will guide you step-by-step through the process of installing Ubuntu Desktop on AWS, configuring Nvidia drivers, and enabling the Amazon DCV server. This setup will allow you to access the remote desktop using the DCV client provided by Amazon.
This configuration is ideal for cloud-based projects requiring GPU resources and a graphical environment like Ubuntu Desktop. Personally, I needed this setup to run 3D-accelerated desktop programs, such as the autonomous driving simulator Carla, on a remote server. If you have similar requirements, this approach might be highly useful for you. In future tutorials, I will cover these tools in more detail.
Starting the Installation
This tutorial consolidates information from Amazon’s official documentation on installing Amazon DCV and Nvidia drivers compatible with AWS cloud for Ubuntu. I will guide you step-by-step through the process that worked for me, simplifying potentially confusing options from the official tutorials. Additionally, I will include notes on potential issues and details that might arise, as some packages have changed over time, and Amazon's tutorials are not always updated promptly.
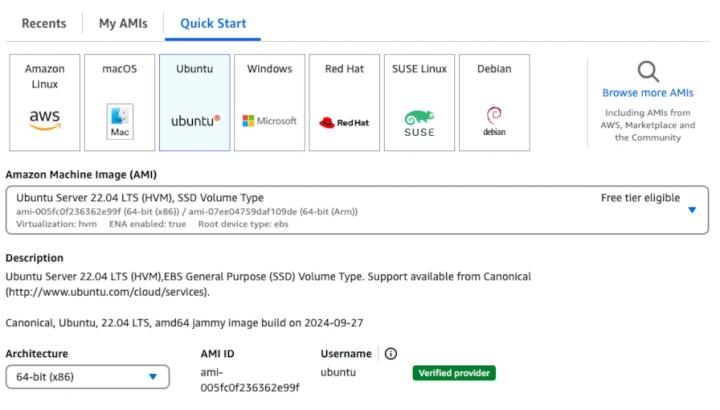
To get started, we will select the Ubuntu 22.04 instance. I recommend this version because several necessary packages do not yet have official support for 24.04 and could cause conflicts.
It is important to begin by installing the prerequisites for the DCV server before proceeding with the Nvidia drivers. This helps avoid conflicts, as the Nvidia installer will detect the pre-installed X11 server, making the installation and integration smoother.
Additionally, I recommend launching a g4dn.2xlarge instance (although a g4dn.xlarge instance could work, keep in mind that its lower CPU capacity will result in a longer installation time). If you lack the quota to create an instance with 8 G-type CPUs, you will need to request a quota increase from Amazon. You can submit this request through this Amazon Quota Increase Request link. Furthermore, I suggest using a 12GB gp2 volume, which is sufficient for this installation. This size allows you to save an AMI image of the disk without consuming too much storage, reducing costs slightly. Later, you can create new instances with larger volumes using this base image.
Steps to Install Amazon DCV
Based on the steps outlined in the official documentation [1], we will install the prerequisites to set up the DCV server.
With the EC2 instance running, connect to it via SSH to proceed. The first step is to install the required packages for Ubuntu Desktop:
sudo apt update
sudo apt install -y ubuntu-desktop
Install GDM3
sudo apt install -y gdm3Verify that GDM3 is configured as the default display manager:
cat /etc/X11/default-display-managerIf the result is /usr/sbin/gdm3, it means it is already set as the default, and no changes are required. Otherwise, you can configure it with the following command:
sudo dpkg-reconfigure gdm3Proceed to update all server packages to ensure you have the latest versions of all Ubuntu packages:
sudo apt -y upgradeYou will likely see a couple of messages similar to the ones below:
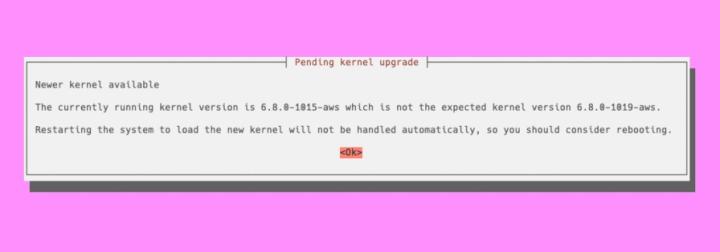
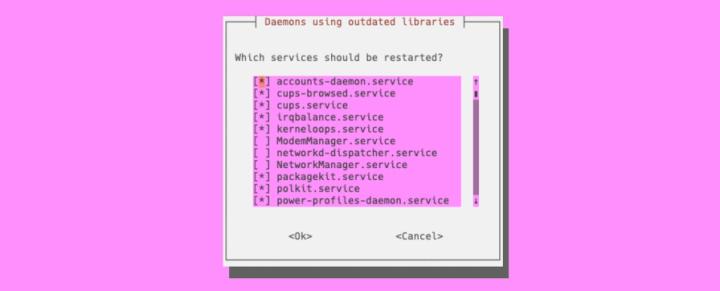
I recommend keeping the default values and proceeding to the next step.
Restart the server to apply all the changes properly:
sudo rebootWait approximately one and a half minutes for the instance to restart, then reconnect via SSH. Next, it is necessary to disable the Wayland protocol, as we require the X11-based graphical environment. The steps to do this on Ubuntu are as follows.
Edit the GDM3 configuration file:
sudo nano /etc/gdm3/custom.confIn the [daemon] section, set WaylandEnable to false. This is typically done by uncommenting that line in the existing file. If the line is not present, you can add it manually:
[daemon]
WaylandEnable=false
Save the file and close it. As the final step for this section, restart GDM3:
sudo systemctl restart gdm3It is recommended to check if the X server is configured to start automatically when Ubuntu boots:
sudo systemctl get-defaultIf the result of this operation is graphical.target, it means the configuration is correct. Otherwise, you can change the configuration with the following command:
sudo systemctl set-default graphical.targetNow, start the X server:
sudo systemctl isolate graphical.targetYou need to ensure that the X server is running:
ps aux | grep X | grep -v grepYou should see an output similar to the following:
gdm 2998 8.6 0.2 1367880 76004 tty1 Sl+ 05:15 0:00 /usr/lib/xorg/Xorg vt1 -displayfd 3 -auth /run/user/133/gdm/Xauthority -nolisten tcp -background none -noreset -keeptty -novtswitch -verbose 3Amazon's documentation also recommends installing a tool package to verify that the following video configurations are working correctly:
sudo apt install -y mesa-utilsQuickly check if OpenGL hardware acceleration is available:
sudo DISPLAY=:0 XAUTHORITY=$(ps aux | grep "X.*\-auth" | grep -v grep | sed -n 's/.*-auth \([^ ]\+\).*/\1/p') glxinfo | grep -i "opengl.*version"If everything is working as expected, you should see an output similar to this:
OpenGL core profile version string: 4.5 (Core Profile) Mesa 23.2.1-1ubuntu3.1~22.04.2
OpenGL core profile shading language version string: 4.50
OpenGL version string: 4.5 (Compatibility Profile) Mesa 23.2.1-1ubuntu3.1~22.04.2
OpenGL shading language version string: 4.50
OpenGL ES profile version string: OpenGL ES 3.2 Mesa 23.2.1-1ubuntu3.1~22.04.2
OpenGL ES profile shading language version string: OpenGL ES GLSL ES 3.20
If you want to consult the source of this information, note that this first part of the tutorial is based on Amazon's official documentation [1].
Installing Nvidia Drivers
Amazon also provides documentation detailing the steps to install various drivers for Nvidia GPUs compatible with its infrastructure. It is crucial to follow these tutorials to install the drivers instead of relying on Ubuntu repositories, as the drivers provided by Amazon are optimized and specifically tailored for the GPU models used in their cloud.
The documentation outlines three types of drivers:
- General-purpose: Ideal for tasks such as machine learning training.
- GRID: The best option for our case, as it allows for managing remote desktops, software requiring graphical acceleration, and simulators needing 3D rendering.
- Gaming: Designed for high-performance graphics in gaming with low latency.
For our purposes, the GRID version of the drivers is the most recommended.
We will now begin installing the GRID drivers based on the corresponding section of Amazon's official documentation [2].
First, update the repository list again:
sudo apt-get -y updateNext, install the packages required to compile and install the drivers:
sudo apt-get install -y gcc makeVerifying GCC Compiler Compatibility
The official tutorial only specifies installing the gcc and make packages. However, based on my experience, you may encounter conflicts if the default version of GCC installed on Ubuntu does not match the one used to compile the current kernel. To address this, I have added additional steps to avoid potential issues.
First, check the currently installed version of the GCC compiler:
gcc --versionYou will see an output similar to the following:
gcc (Ubuntu 11.4.0-1ubuntu1~22.04) 11.4.0
Copyright (C) 2021 Free Software Foundation, Inc.
This is free software; see the source for copying conditions. There is NO
warranty; not even for MERCHANTABILITY or FITNESS FOR A PARTICULAR PURPOSE.
Next, verify the GCC version used to compile the kernel currently installed on your Ubuntu server:
cat /boot/config-$(uname -r) | grep CONFIG_CC_VERSION_TEXTThe output will look something like this:
CONFIG_CC_VERSION_TEXT="x86_64-linux-gnu-gcc-12 (Ubuntu 12.3.0-1ubuntu1~22.04) 12.3.0"As you can see, the GCC version installed on your server differs from the one used to compile the kernel. This occurs because the kernel was precompiled and packaged for distribution by Canonical, and it does not necessarily match the compiler version available by default in the repositories. In my opinion, this is an issue that should be addressed soon.
To avoid conflicts when installing the Nvidia drivers due to this mismatch in GCC versions, I have included the following steps in the tutorial. If this does not apply to your case, you may skip this block of instructions.
Since the GCC version used to compile the kernel is 12, proceed to install this version directly:
sudo apt install -y gcc-12Now, update the system's default compiler version to point to this newly installed version:
sudo update-alternatives --install /usr/bin/gcc gcc /usr/bin/gcc-11 10
sudo update-alternatives --install /usr/bin/gcc gcc /usr/bin/gcc-12 20
sudo update-alternatives --set gcc /usr/bin/gcc-12
Afterward, verify that the default version is now 12 instead of 11:
gcc --versionThe output should be:
gcc (Ubuntu 12.3.0-1ubuntu1~22.04) 12.3.0
Copyright (C) 2022 Free Software Foundation, Inc.
This is free software; see the source for copying conditions. There is NO
warranty; not even for MERCHANTABILITY or FITNESS FOR A PARTICULAR PURPOSE.
With this completed, you can proceed with the installation of the Nvidia GRID drivers.
Installing the GRID Version of Nvidia Drivers
As the next step in installing this driver, verify that the linux-aws package is installed on your Ubuntu system:
sudo apt-get upgrade -y linux-awsNow restart the server to apply all previous changes. Wait one to two minutes before reconnecting via SSH:
sudo rebootOnce connected, proceed to install the kernel headers packages for Linux:
sudo apt-get install -y linux-headers-$(uname -r)Next, disable the generic nouveau graphics driver, which is a mandatory step before installing the Nvidia drivers:
cat << EOF | sudo tee --append /etc/modprobe.d/blacklist.conf
blacklist vga16fb
blacklist nouveau
blacklist rivafb
blacklist nvidiafb
blacklist rivatv
EOF
Now, edit the /etc/default/grub file:
sudo nano /etc/default/grubWithin this file, locate the GRUB_CMDLINE_LINUX variable and modify its value as follows:
GRUB_CMDLINE_LINUX="rdblacklist=nouveau"Save and close the file. Then, update GRUB:
sudo update-grubInstall AWS CLI and Add S3 Read Role
It is essential that your EC2 instance has the correct S3 read permissions for the following steps. Here is a tutorial to help you set this up [3]. Essentially, you need to add the required permissions using a role in AWS IAM. If you already know how to do this without following a tutorial, feel free to complete this step on your own.
Next, proceed to install the AWS CLI client:
sudo apt install -y awscliOnce this is resolved, we can proceed with the next steps for the official tutorial. Download the latest version of the Nvidia GRID drivers for Amazon.
Download and Install the Drivers
aws s3 cp --recursive s3://ec2-linux-nvidia-drivers/latest/ .Grant execution permissions to the downloaded file:
chmod +x NVIDIA-Linux-x86_64*.runRun the driver installer file:
sudo /bin/sh ./NVIDIA-Linux-x86_64*.runYou may see a couple of messages during this installation process:
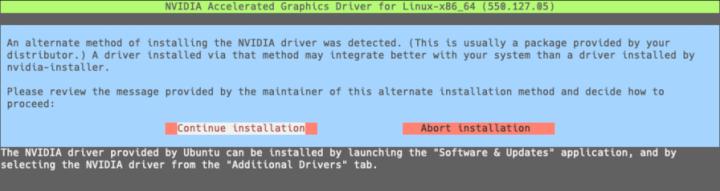
You can accept and continue with the installation.
Afterward, you will see the following messages:
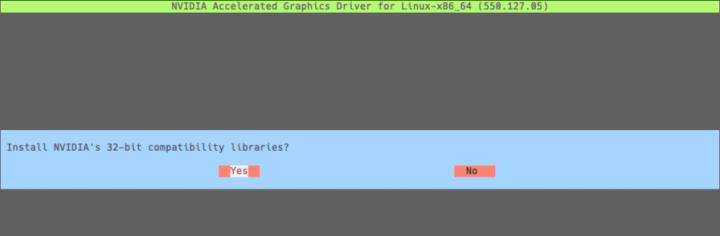
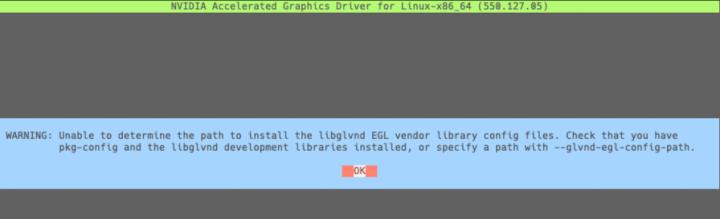
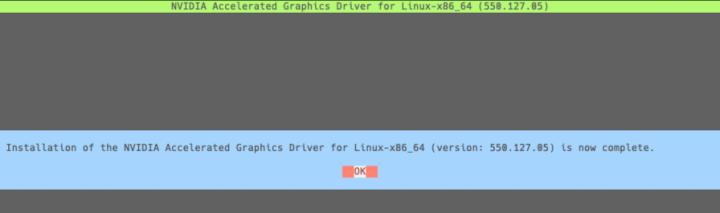
You can accept both options, and there should be no issues. If everything goes well, you will see a confirmation message indicating the drivers have been successfully installed.
We confirm that the driver was installed correctly using the following command:
nvidia-smi -q | headThe output should look something like this:
==============NVSMI LOG==============

Timestamp : Mon Dec 9 06:28:24 2024
Driver Version : 550.127.05
CUDA Version : 12.4

Attached GPUs : 1
GPU 00000000:00:1E.0
Product Name : Tesla T4
This indicates that the GPU drivers are installed and functioning as expected.
An additional step recommended by Amazon's official documentation is to disable the NVreg_EnableGpuFirmware option for the driver. The reasons for this are detailed in the following source [4]. To do this, first, create the necessary blank configuration file and include the required options:
sudo touch /etc/modprobe.d/nvidia.confecho "options nvidia NVreg_EnableGpuFirmware=0" | sudo tee --append /etc/modprobe.d/nvidia.confRestart the server:
sudo reboot
After installing the Nvidia drivers, update the xorg.conf file. According to Amazon's documentation, if we are using an EC2 instance of type G3, G4, or G5 (as in our case), the command to execute is:
sudo nvidia-xconfig --preserve-busid --enable-all-gpus --connected-monitor=DFP-0,DFP-1,DFP-2,DFP-3Additionally, ensure that the /etc/X11/XF86Config file is removed if it exists:
sudo rm -rf /etc/X11/XF86Config*Restart the X server to apply the changes:
sudo systemctl isolate multi-user.target
sudo systemctl isolate graphical.target
Verify that OpenGL acceleration is now being performed using the Nvidia drivers:
sudo DISPLAY=:0 XAUTHORITY=$(ps aux | grep "X.*\-auth" | grep -v grep | sed -n 's/.*-auth \([^ ]\+\).*/\1/p') glxinfo | grep -i "opengl.*version"The expected output should look something like this:
OpenGL core profile version string: 4.6.0 NVIDIA 550.127.05
OpenGL core profile shading language version string: 4.60 NVIDIA
OpenGL version string: 4.6.0 NVIDIA 550.127.05
OpenGL shading language version string: 4.60 NVIDIA
OpenGL ES profile version string: OpenGL ES 3.2 NVIDIA 550.127.05
OpenGL ES profile shading language version string: OpenGL ES GLSL ES 3.20
This confirms that everything is functioning correctly as needed.
Installing the Amazon DCV Server
Once the Nvidia drivers are correctly installed on our Ubuntu server and the Ubuntu desktop environment is set up (as completed in previous steps), we can proceed to install the Amazon DCV server.
The following steps are based on the official Amazon DCV server installation tutorial [5].
The Amazon DCV server packages are digitally signed with a secure GPG key. To allow the package manager to verify the package signature, you must import the Amazon DCV GPG key:
wget https://d1uj6qtbmh3dt5.cloudfront.net/NICE-GPG-KEY
gpg --import NICE-GPG-KEY
You should see an output similar to this:
gpg: directory '/home/ubuntu/.gnupg' created
gpg: keybox '/home/ubuntu/.gnupg/pubring.kbx' created
gpg: /home/ubuntu/.gnupg/trustdb.gpg: trustdb created
gpg: key 11B5C70A170C6114: public key "NICE s.r.l. <support@nice-software.com>" imported
gpg: Total number processed: 1
gpg: imported: 1
Download the necessary packages from the Amazon DCV site. The links for the Ubuntu version we are using are as follows:
wget https://d1uj6qtbmh3dt5.cloudfront.net/2024.0/Servers/nice-dcv-2024.0-17979-ubuntu2204-x86_64.tgzExtract the files from the downloaded compressed package:
tar -xvzf nice-dcv-2024.0-17979-ubuntu2204-x86_64.tgz && cd nice-dcv-2024.0-17979-ubuntu2204-x86_64This will extract several .deb installation files needed for the next steps.
Install the Amazon DCV server:
sudo apt install -y ./nice-dcv-server_2024.0.17979-1_amd64.ubuntu2204.debInstall the web version of the Amazon DCV server (in future tutorials, I will explain how to take full advantage of this feature):
sudo apt install -y ./nice-dcv-web-viewer_2024.0.17979-1_amd64.ubuntu2204.debAdd the dcv user to the video group:
sudo usermod -aG video dcvFinally, install the nice-xdcv packages:
sudo apt install -y ./nice-xdcv_2024.0.627-1_amd64.ubuntu2204.debThe remaining steps in the official tutorial are optional and not needed for our purposes.
As the final step, start the DCV server:
sudo systemctl enable dcvserver
sudo systemctl start dcvserver
Adding a User for the DCV Server
At this point, Amazon DCV is installed and running on the Ubuntu server. This service offers a wide range of options and configurations. However, in the following steps, I will focus on a basic configuration that involves creating a specific user account to access the DCV server and use it as a remote desktop, leveraging the available GPU resources.
It is not recommended to use the default Ubuntu user account provided in AWS images. It is designed for access via key files instead of passwords, which can complicate the process in practice.
To create a dedicated user account exclusively for accessing the DCV server, begin with the following command:
sudo adduser robomousThis starts the creation of a new user named robomous (you can choose a different username if you prefer). You will be prompted to set a password and provide additional information during the user creation process. You can set any password you wish and leave the rest of the fields blank.
Next, add the new user to the sudo group to grant them permission to install packages and perform other administrative tasks:
sudo usermod -aG sudo robomousThe following steps are a compilation of various adjustments I tested over time to determine the minimal configuration necessary for logging in exclusively with the newly created user. Start by editing the /etc/dcv/dcv.conf file:
sudo nano /etc/dcv/dcv.confIn this file, you need to make some changes following the instructions included in the template. Below, I outline the sections to modify and the specific values required. Proceed to make the changes in the file as follows:
[session-management]
create-session = true

[session-management/automatic-console-session]
owner = "robomous"

[security]
authentication="system"
After making these changes, save the file and restart the Ubuntu server:
sudo rebootAmazon DCV Client
Before installing the client, ensure that port 8443 in the Security Group for your EC2 instance is open to the public or, at minimum, to your IP address. Otherwise, you will not be able to connect remotely.
To connect to your remote desktop server, you need to install the DCV client. From the following link, download the version corresponding to your operating system [6].
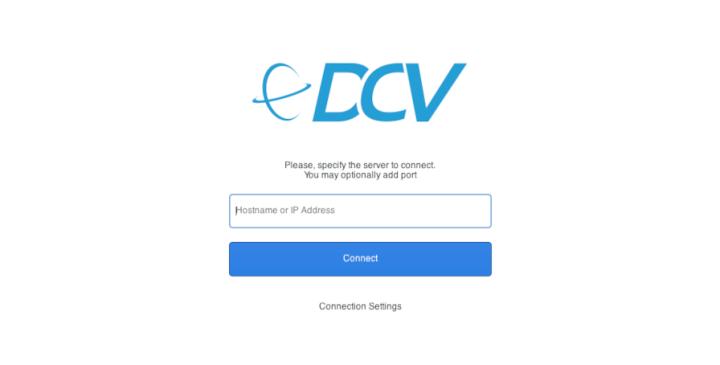
The DCV client will look like this, prompting you to enter the IP address or DNS of your server. You can copy the public DNS of your Ubuntu server from the AWS console and use it in this field.
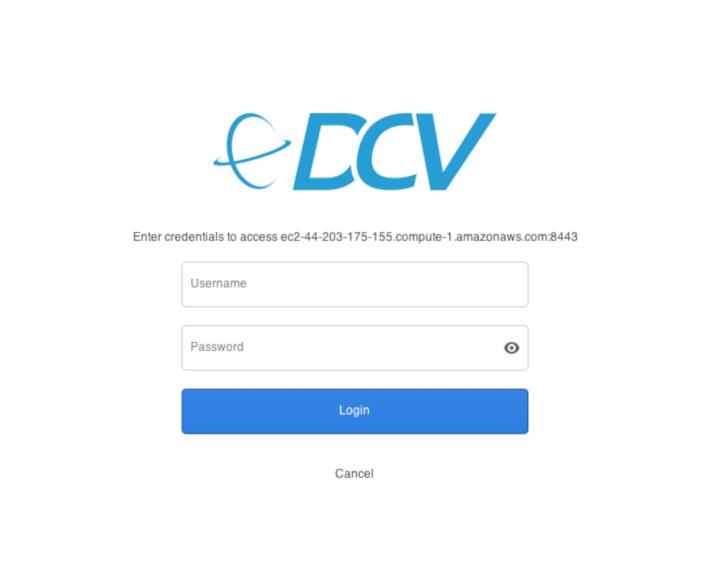
If the server is correctly configured, you will see the login screen. Here, enter the username and password for the user you created.
You will then need to log in again within Ubuntu using your password. Once done, you can connect to your remote desktop server.
Optional: Install Docker for Nvidia GPUs
This step is entirely optional, though I recommend having Docker installed and configured to use Nvidia drivers, as it can be very useful for future projects. If you don’t plan to work with Docker containers, you can skip this part of the tutorial and proceed to the next section.
To begin, we need to install Docker on Ubuntu. According to Docker's official documentation, the steps are as follows:
First, configure Docker’s repository on Ubuntu:
# Add Docker's official GPG key:
sudo apt-get update
sudo apt-get install ca-certificates curl
sudo install -m 0755 -d /etc/apt/keyrings
sudo curl -fsSL https://download.docker.com/linux/ubuntu/gpg -o /etc/apt/keyrings/docker.asc
sudo chmod a+r /etc/apt/keyrings/docker.asc
# Add the repository to Apt sources:
echo \
"deb [arch=$(dpkg --print-architecture) signed-by=/etc/apt/keyrings/docker.asc] https://download.docker.com/linux/ubuntu \
$(. /etc/os-release && echo "$VERSION_CODENAME") stable" | \
sudo tee /etc/apt/sources.list.d/docker.list > /dev/null
sudo apt-get update
Now, install Docker and its dependencies:
sudo apt install -y docker-ce docker-ce-cli containerd.io docker-buildx-plugin docker-compose-pluginAdd the newly created user to the Docker group to allow container execution without sudo permissions:
sudo usermod -aG docker robomousNext, install the Nvidia Docker packages by adding their repository to Ubuntu:
curl -fsSL https://nvidia.github.io/libnvidia-container/gpgkey | sudo gpg --dearmor -o /usr/share/keyrings/nvidia-container-toolkit-keyring.gpg \
&& curl -s -L https://nvidia.github.io/libnvidia-container/stable/deb/nvidia-container-toolkit.list | \
sed 's#deb https://#deb [signed-by=/usr/share/keyrings/nvidia-container-toolkit-keyring.gpg] https://#g' | \
sudo tee /etc/apt/sources.list.d/nvidia-container-toolkit.list
sudo apt update
Install the Nvidia Docker package:
sudo apt install -y nvidia-container-toolkitConfigure Docker to use this package:
sudo nvidia-ctk runtime configure --runtime=dockerRestart the Docker service:
sudo systemctl restart dockerNow, verify that Docker works correctly with Nvidia drivers. You can use the following test image, which should display the output of nvidia-smi with the technical details of the installed driver.
First, switch from the ubuntu user to the newly created robomous user in the console:
sudo su - robomousFrom this account, execute the following command to test that Docker and Nvidia are working together:
docker run --rm --runtime=nvidia --gpus all ubuntu nvidia-smiThe expected output should look like this:
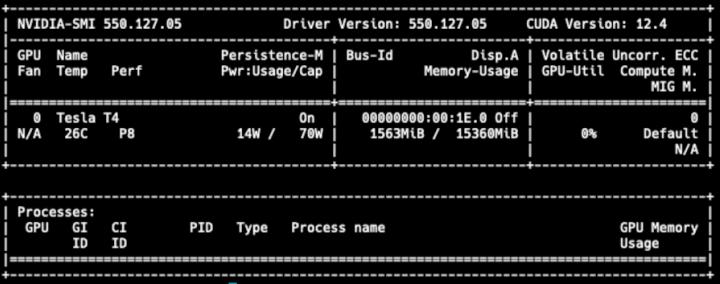
With this, Docker with Nvidia is fully operational on your system. Don’t forget to exit the new user session and return to the default ubuntu user session before proceeding to the final step:
exitCreate an AMI with the Changes
I highly recommend creating an AMI image with all these changes. This will allow you to use it as a base for future projects, ensuring that all configurations are preserved and available for any environment where this remote desktop is needed.
Before creating the image, it is important to clean the server of all temporary files to prevent them from being unnecessarily included in the image. From the ubuntu account used to install the packages in this tutorial, remove all downloaded files in the home directory with the following command:
rm -rf [!.]* # Remove all not-hidden files at home.Also, delete the files in the system's temporary directories:
sudo rm -rf /tmp/*
sudo rm -rf /var/tmp/*
Finally, restart the server before stopping it from the AWS console:
sudo rebootOnce restarted, stop the instance from the AWS console (do not terminate it, just stop it) and wait until its status indicates it is completely stopped.
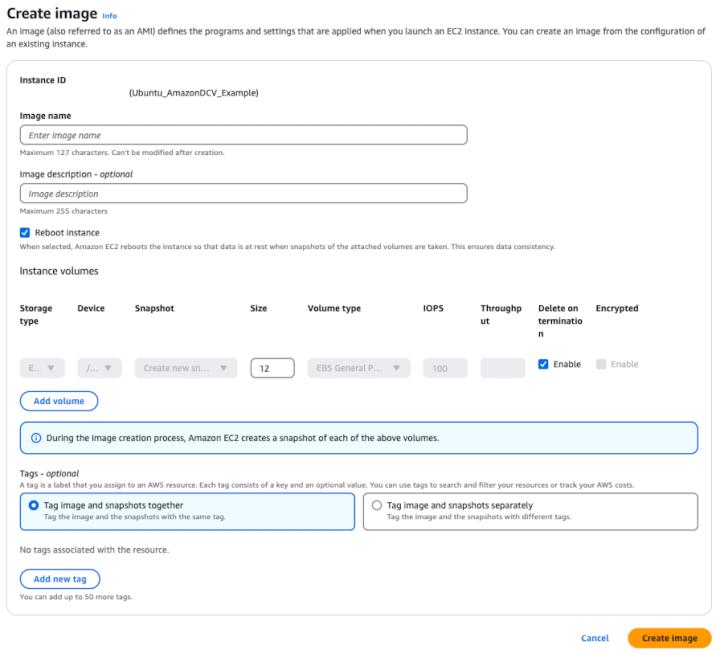
When the instance is fully stopped, right-click on it, select the Image and Templates option, and then choose Create Image.
Fill in the required fields: assign a name to the image without spaces and using only alphanumeric characters, add a description detailing the image's content, and click the Create Image button. The process will take a few minutes to complete.
When creating new instances, preferably of the same type as the one used to generate the image, you can select this image from the My AMIs list in the Launch Instance section of the AWS console.
This concludes the tutorial for installing Amazon DCV on Ubuntu. If you have any questions or comments related to this topic, feel free to contact me through the channels shared in my profile.
References:
[1] Prerequisites for Linux Amazon DCV servers
[3] How can I grant my Amazon EC2 instance access to an Amazon S3 bucket?
[4] NVIDIA Virtual GPU Software Latest Release (v17.0 through 17.4)